ALM For Power Platform/CDS In Azure-Devops/VSTS Using Power Platform Build Tools – Part 2
- Sep 14, 2020
- 4 min read
In the previous post, I showed you how to setup the Azure DevOps and install Power Platform Build Tools to Azure DevOps. In this blog post, I will show you how we can export from the Dynamics 365 CE instance and commit to VSTS/Azure DevOps.
Below is the VSTS Build-pipeline and will include the following steps
How to setup VSTS Build Definition
In Build Pipeline, we will be exporting the CRM solution, unpack it using the Power Platform Build Tools and store the solution file in Artifacts. You can create a build definition directly from Visual Studio Online (VSTS/Azure-DevOps) or from within Visual Studio. Firstly, I will show you how to create a build definition from within Visual Studio, navigate to the Builds tab in the Team Explorer:


Once there, you can click New Build Definition to be taken directly to Visual Studio Online. This is where you would start if you had decided to create the build definition directly from Visual Studio Online instead of starting in Visual Studio.
On the dialog box that pops up in the browser, we’ll select Visual Studio as our build template, but you can see there are other templates for use, such as Xamarin for Android or iOS and the Universal Windows Platform. The default settings for your build definition should be correct for the most part, but you will need to check the Continuous Integration checkbox. Here is what they look like for this example:

Because this is a simple example and we don’t need the additional flexibility the Default queue provides, we can leave the default Hosted option selected in the Default agent queue field. For more information on the restrictions on the Hosted pool.
You can see the checkbox for CI at the bottom of the dialog. This is enabled so that Visual Studio Online will execute the defined build definition for each check-in. The build definition will define whether this build code is published to an environment. Since we want to continually build and deploy to our web environment, we will check this box.
We can create the build definition from Azure Dev Ops too by following the below steps.
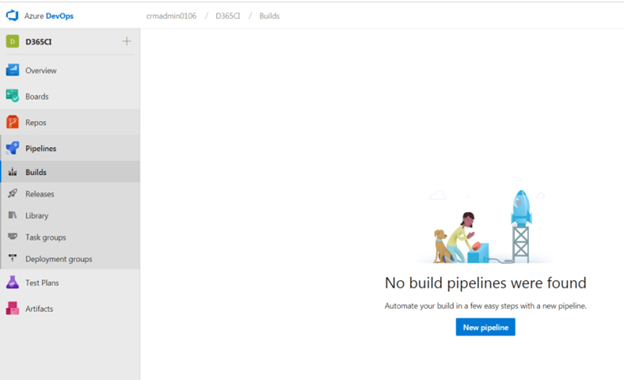
Navigate to Pipelines -> Builds -> Click New Pipeline

Click the Visual Designer, which will allow you to perform using GUI.
Select the Team Project, Repository, Branch and click on the continue button. For Demo purpose, I have given the name of the build definition as ALM – PowerApps and Dynamics 365-CI

In the next step, select an empty job as shown below:

After selecting an empty job, you can see the empty Agent Job and Select the Agent Pool as Hosted

Next step is we need to configure the VSTS build definition as shown in the below diagram.

1. PowerPlatform Tools Installer
Every pipeline that uses the PowerPlatform Build Tools must install them as a first step. This ensures that they are really installed on the Agent.
2. PowerPlatform Publish Customizations
As a second step, we need to publish all customizations. In this step, you only must choose your connection.
Please refer my previous blog or video to understand how we need to create the service connection for the Power Platform Build Tools.
Blog post Reference: https://d365dotblog.wordpress.com/2020/06/01/alm-how-to-create-service-connection-for-the-powerapps-build-tools/
Video Reference: https://d365dotblog.wordpress.com/2020/06/16/alm-power-platform-tips-tricks-create-service-connection-for-the-powerapps-build-tools-in-azure-devops-vsts/
3. PowerPlatform Export Solution
As a next step, we need to export the solution from the Power Platform source instance. We are using “Export Solution” to export the solution from the Power platform instance.

Note: Please update the solution name and solution output file in the Power Platform Export solution task
Solution Name: $(SolutionName)
Solution Output File: $(Build.ArtifactsStagingDirectory)\$(SolutionName).zip
4. PowerPlatform Unpack Solution
As a next step, we are going to unpack the solution using Power Platform Unpack solution ask as below:

Solution Input File should be the same as the output in the last step. In our case:
$(Build.ArtifactsStagingDirectory)\$(SolutionName).zip Target Folder to Unpack Solution should be the folder where you would like to store your unpacked solution in the repo. In our case, we will have a folder in the root which has the name of the solution.
$(Build.ArtifactsStagingDirectory)\$(SolutionName) 5 – Commit solution to repo
Final step is to add the extracted solution to our repo. To do this we will add a standard “Command Line” step. There you will add the following code to “Script” field:
echo commit all changes
git config user.email "<email>"
git config user.name "Automatic Build"
git checkout master
git add --all
git commit -m "solution init"
echo push code to new repo
git -c http.extraheader="AUTHORIZATION: bearer $(System.AccessToken)" push origin master
You must replace “<email>” with the email of the user you would like to use to push your changes.
6 – General Pipeline configuration
Below are the some of the general configurations you need to enable in this pipeline.
For the agent, we need to allow scripts to use the OAuth token. If this is not configured our command-line script will not be able to connect to the repo and push our solution. The configuration should look like this

In our PowerPlatform Export Solution steps, we have used a variable called “SolutionName”. We need to make sure we are updating the solution name before running the VSTS Build pipeline. Now you can test the pipeline by running it. This can either be done via the “Queue” text if you are still in the edit mode or by using the “Run pipeline” button.


In my next blog, we will see how to pack the solution and deploy it in the Target instance using Power Platform Build Tools.
If you are interested in this topic and would like to do some further self-study, I encourage you to check out my blog on this.


Comments